How to Install the UnderCover Swing Case — Step-by-Step Guide
What You Need
Tools
- Power drill — cordless preferred for reach into the bed
- 5/16" drill bit — high-speed steel; fresh bit recommended (bed rail cap is thick)
- 3/8" socket and ratchet (or 3/8" hex bit in the drill) — for the hex-head screws
- Tape measure — to verify 180° swing clearance before drilling
- Marker or center punch — to mark hole locations through the bracket
- Rotary tool (only if you have a spray-in bedliner — see Bedliner Warning below)
What comes in the box
- SwingCase unit (hinged to bracket, pre-assembled)
- Six 5/16" self-tapping hex-head screws
- Installation instructions sheet
⚠ Bedliner Warning — Read Before You Drill
- Spray-in bedliner (LINE-X, Rhino Liner, similar): You must cut or grind the liner at each of the six hole locations before drilling. Self-tapping screws will not seat correctly through thick spray-in liner — the liner compresses rather than being penetrated cleanly, and the bracket will sit proud of the rail. Use a rotary tool or oscillating multi-tool to remove liner only at the screw footprint. Seal cut edges with rubberized undercoating to prevent corrosion.
- Drop-in plastic bedliner: Standard drop-in liners sit loose in the bed and do not interfere with the rail cap mount. No modification needed.
- No bedliner: Clean the rail cap surface before marking. Bare metal rail caps install without preparation.
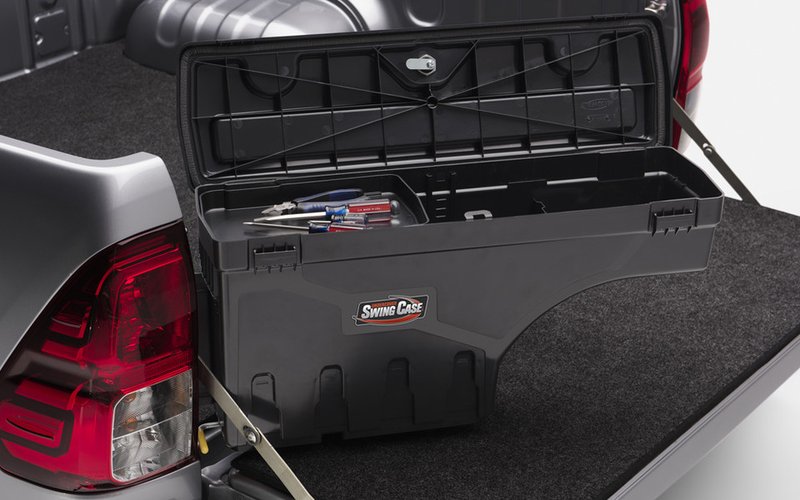
Step-by-Step Install
Step 1 — Confirm your model code before opening the box
Check the model code on the SwingCase box against UnderCover's fitment tool for your truck year, model, and bed length. SwingCase codes are specific to the rail profile — an F-150 code will not sit flush on a Silverado even if it appears to fit by eye. Return policy at most retailers requires the item to be unopened. Confirm the code before you break the seal.
Step 2 — Set the case in position and check 180° swing clearance
This is the step the manual undersells. Set the SwingCase in its intended install location by resting the hinge bracket on the bed rail cap. Swing the case fully open to 180° and check three clearances:
- Tailgate clearance: The open case should clear the tailgate with at least 1/2" to spare. On some short-bed configs the case can contact the tailgate at full swing — if it does, move the bracket forward (toward the cab) by 2–4 inches and recheck.
- Tonneau cover clearance: If you have or plan to have a tonneau cover, 3 inches of clearance between the SwingCase lid and the tonneau surface is required when both are closed. Verify this before drilling — you cannot adjust after the holes are in.
- Tie-down anchor: The SwingCase will cover the tie-down anchor directly below its bracket position. Check which anchor that is and decide whether you need to relocate any load straps before mounting.
Step 3 — Mark the six hole locations
With the bracket confirmed in position, insert a marker or punch through each of the six bracket holes and mark the rail cap. Mark all six before removing the bracket so the pattern is complete. Remove the case and double-check that your six marks are evenly spaced and align with the bracket slot pattern.
Step 4 — Prepare the surface (spray-in liner only)
If you have a spray-in bedliner, use a rotary tool to remove liner at each of the six marked locations. Clear an area slightly larger than the screw head diameter. Do not remove liner beyond what the screw head will cover. When done, wipe the cleared areas and apply a thin bead of rubberized undercoating around each cleared circle to seal against moisture.
Step 5 — Pre-drill all six pilot holes
Use a 5/16" drill bit. Drill perpendicular to the rail cap surface. Keep steady pressure — the bit will break through the cap material and into the underlying rail structure. Drill all six holes before repositioning the bracket. Remove any metal chips with a rag. If a bit wanders and elongates a hole, stop: an elongated hole will not give the self-tapping screw a clean seat. Plug the hole with a rubber grommet and shift the bracket slightly to use a fresh hole location.
Step 6 — Mount the bracket and drive the screws
Position the bracket over the six pre-drilled holes. Start all six screws by hand until each catches the thread, then tighten with a 3/8" socket. Alternate sides as you drive — left-front, right-front, left-middle, right-middle, left-rear, right-rear. This keeps the bracket flat and prevents it racking under torque. Tighten until the bracket is firm against the rail cap. Do not overtorque — the self-tapping screws thread into relatively thin sheet metal. Stripped holes are the second most common install complaint after the measurement issue.
Step 7 — Attach the SwingCase and test all functions
Clip the SwingCase onto the hinge bracket. The case clips on from the open position — swing it closed until it latches. Test the following:
- Quick-release latch: Opens with one hand, no key.
- Twist lock: Engage the twist mechanism and confirm the latch cannot be popped without releasing the twist first.
- Padlock hasp: Insert a padlock (not included) and confirm it seats. Most owners use a standard 3/8" shackle padlock.
- Full 180° swing: Open the case completely and confirm it rests parallel to the bed side without contacting the tailgate or tonneau hardware.
- Moisture seal: Close and latch the case; run your finger around the perimeter seal to confirm it seats evenly with no gaps.
Install on a Truck with a Tonneau Cover
The SwingCase is designed to be tonneau-compatible, but compatibility is not automatic — it depends on the specific tonneau cover profile and how much vertical clearance exists between the rail cap and the tonneau surface when closed.
The 3-inch clearance rule: UnderCover specifies a minimum 3 inches of clearance between the SwingCase lid (when closed) and the bottom of the closed tonneau cover. Tonneau covers that mount directly on the rail cap with a low profile — roll-up tri-fold designs, especially aftermarket fits — are most likely to create a tight fit.
Retractable covers (Retrax, Roll-N-Lock) and hard folding covers (BakFlip) typically leave enough clearance, but the specific series within each brand matters. A full compatibility breakdown by tonneau brand and model: SwingCase Tonneau Cover Compatibility Guide →
If your tonneau cover is in place during install, ensure the tonneau rail hardware does not sit in the path of your SwingCase bracket. The SwingCase bracket mounts to the bed rail cap; the tonneau typically mounts to the same rail or a clamp on it. Measure before drilling.
Common Install Mistakes
| Mistake | What Happens | How to Avoid |
|---|---|---|
| Skipping the 180° swing test | Case contacts tailgate when opened fully | Always swing the case fully before marking holes |
| Overtorquing the screws | Stripped holes — bracket will not hold | Tighten to firm, not to maximum torque; alternating pattern |
| Drilling through spray-in liner without clearing | Bracket sits proud of rail; screws do not seat | Clear liner at each screw location with rotary tool first |
| Wrong model code | Bracket does not sit flush on your truck's rail profile | Verify code on UnderCover's fitment tool before opening box |
| Not marking all 6 holes before moving the bracket | Bracket repositioned slightly; holes misalign | Mark all 6, then remove bracket — never drill mid-sequence |